The quilted trifold three zipper pouch can be used to organize whatever you want. Great for those who love to quilt or you can use pre-quilted “double faced quilted” cotton fabric. The vinyl pockets allows you to view the contents and are easily cleaned with a cloth. The tutorial will take you through the steps to create this pouch for yourself or to give it as a gift. Happy Sewing!

Materials Needed

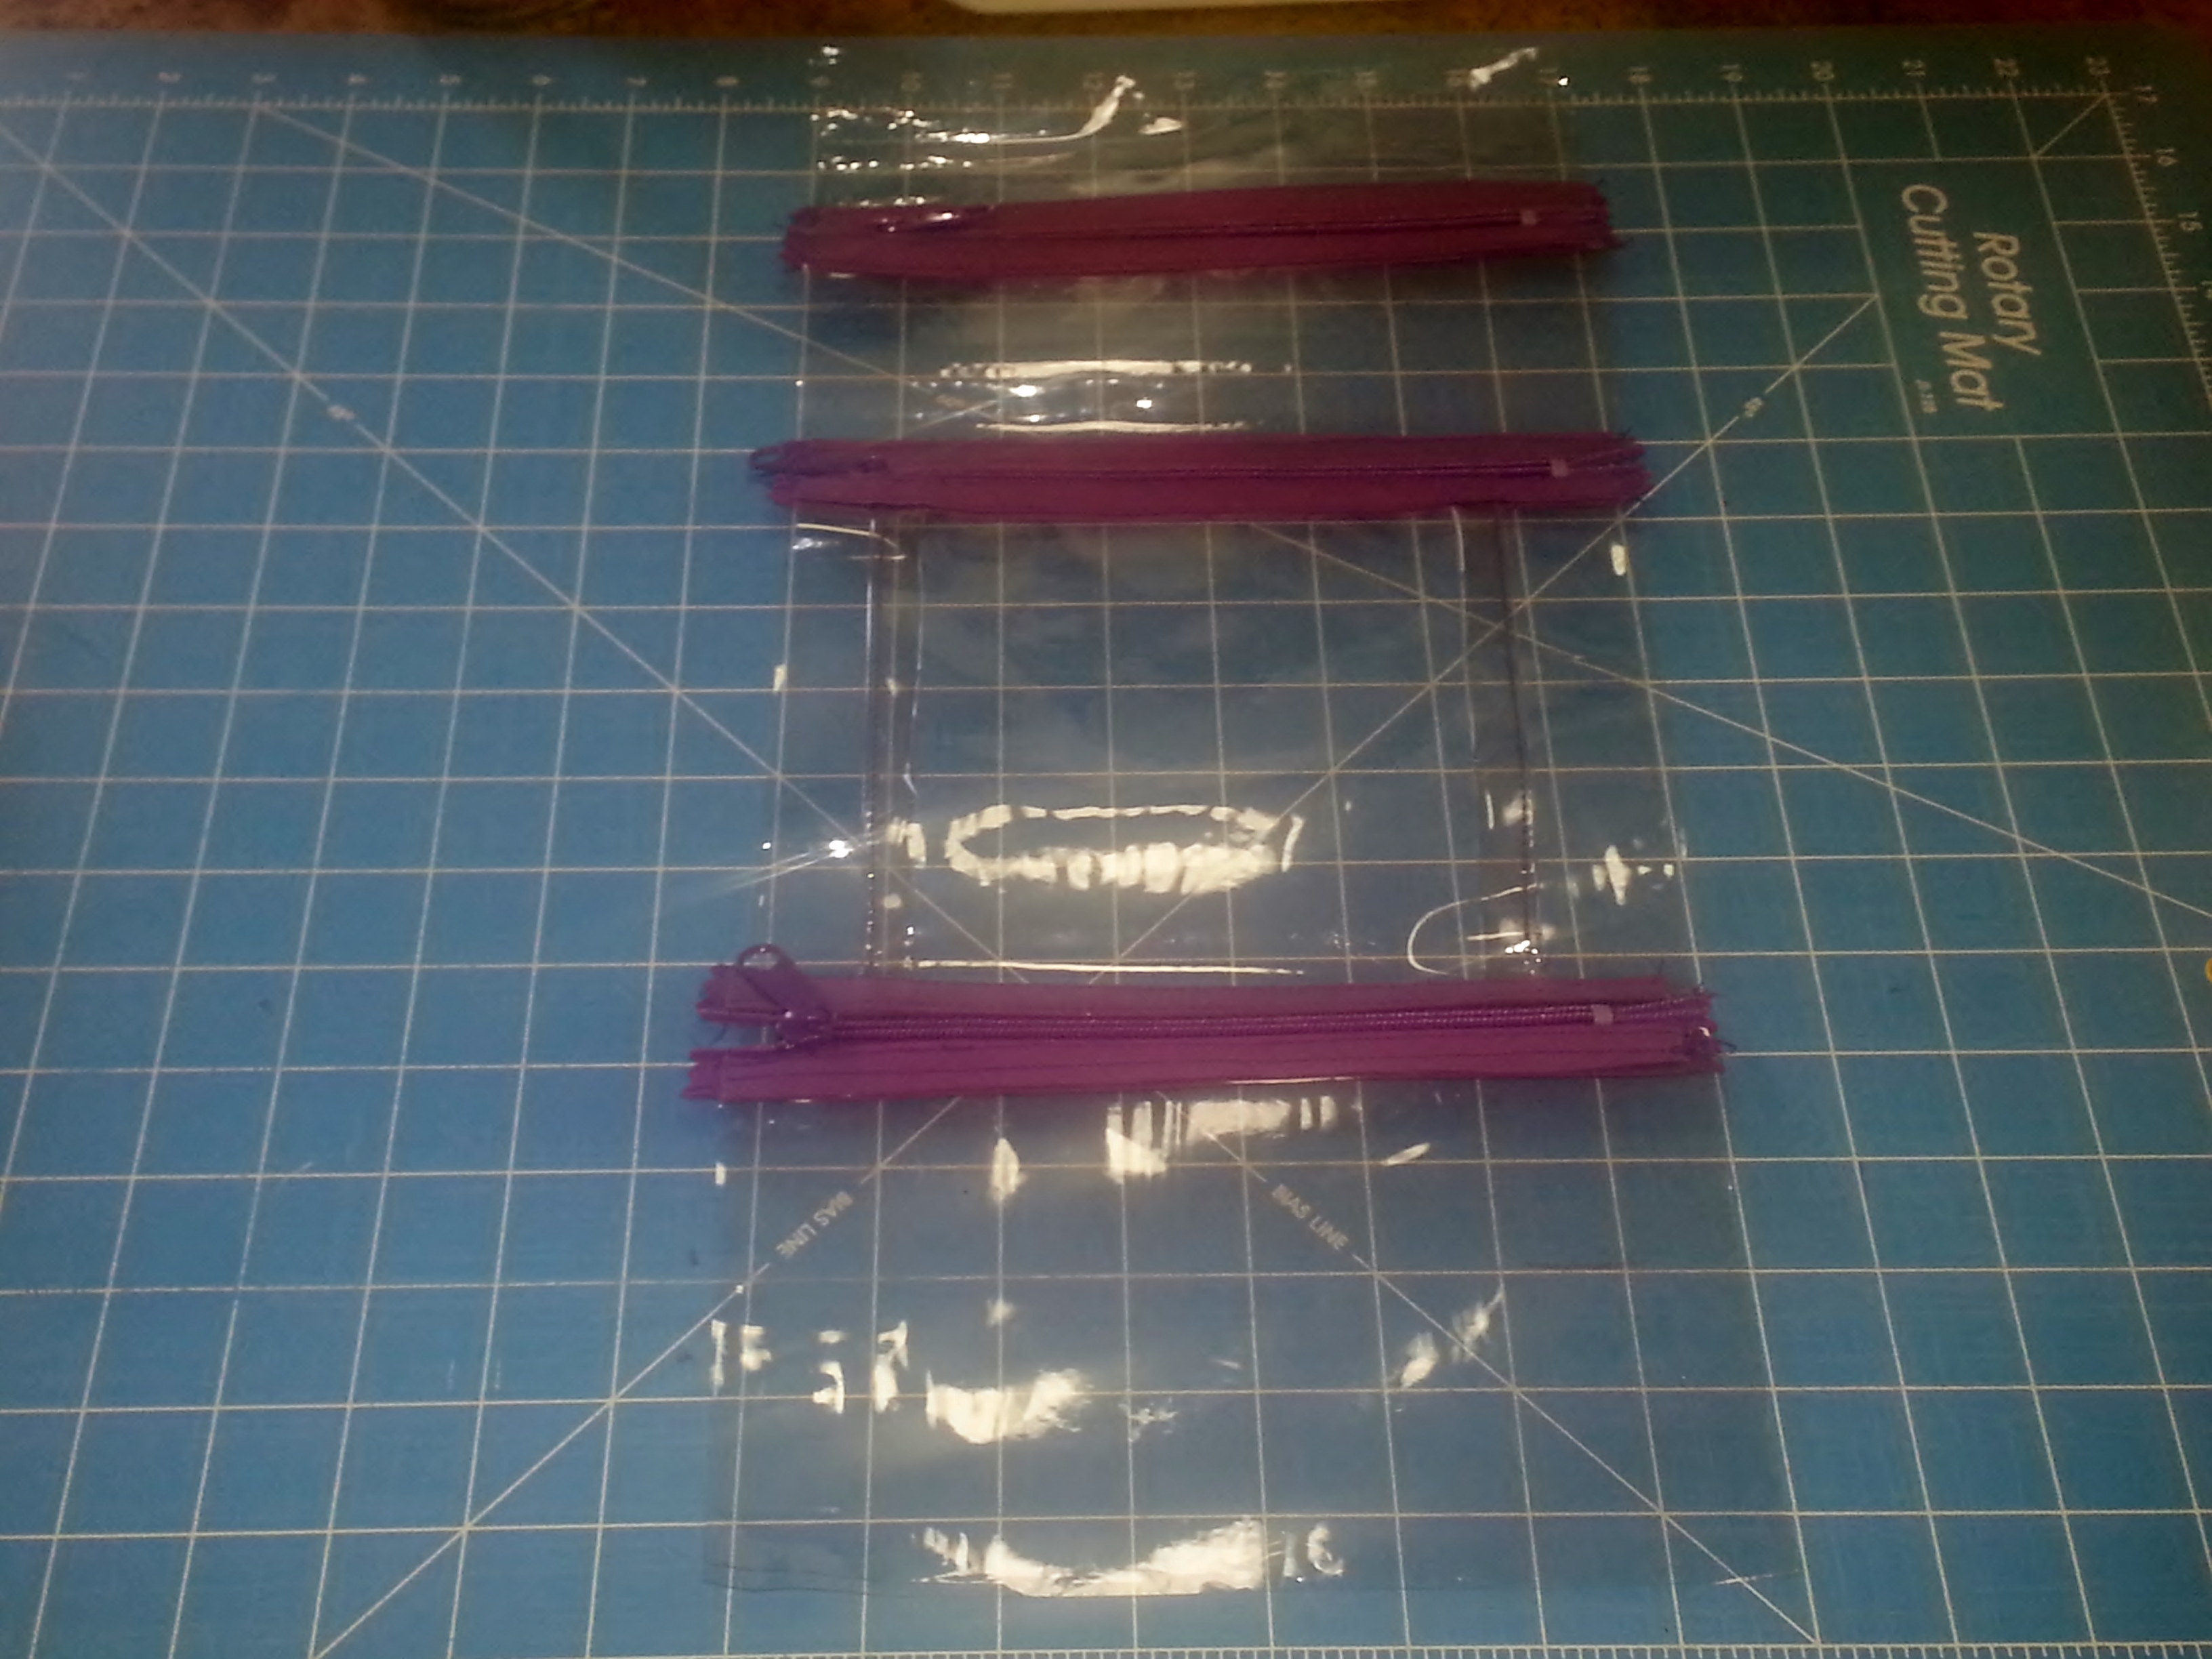
- Three 7″ zippers (source: Zipper Island on Etsy)
- Matching Bias Tape Extra Wide Double Fold 3 yds /2.74m- .5 inch wide
- Pre-quilted “double faced cotton fabric” – Fat quarter
- Clear vinyl 1/2 yard
- Coordinating thread
- Plastic paper clips or clamps
Pattern Pieces
- Cut (1) pre-quilted fabric – 8″ width x 17″ length
- Cut (3) binding strips of fabric – 2″width X 17″ length & cut (1) – 2″ width X 7″ length
- Cut (1) clear vinyl – 8″ width X 17″ length
- Clear vinyl pockets:
- Top upper pocket – 8″width X 2.5 ” length
- Top pocket – 8″width X 4″ length
- Middle pocket -12″ width X 7″ length
- Bottom pocket – 8″ width X 5″ length
- Clear vinyl pockets:
- Cut (6) Strips of Bias Tape 8″length (use remaining bias tape for the bag tie).
Instructions:
1. Sew zippers onto vinyl pockets: Start with bottom pocket and work toward the top. (*Note: When sewing the zipper onto the vinyl, set your stitch tension to 3.0 for the length of the stitch and 1.0 for the stitch width.)

-
Bottom pocket: Make 1/2 inch fold on the top of the vinyl pocket and place the fold in between the bias tape strip. Center on the zipper bottom and sew two seams 1/4″ on the top and bottom of the bias tape .
-
Middle pocket: Fold a 1″ pleat two inches from each side of the vinyl. Sew a 1/4″ seam down the top edge of the pleat only. (Note: Change stitch length to 3.5 and 1.5 width and don’t sew the pleat closed.)
-
Fold each 1″ pleat toward each edge of the pocket.
-
Fold the bottom of the vinyl 1/2 inch toward the front of the pocket, place the fold in between the bias tape strip, center on the first zipper and sew two seams 1/4″ on the top and bottom of the bias tape .
(Note: You will sew a finishing seam on the bottom of the pocket at the top of the zipper when you attach the pocket to the vinyl lining.)
-
Fold the top of the vinyl top 1/2 inch toward the front of the pocket, place the fold in between the bias tape strip, and center on bottom of the zipper second zipper. Sew two seams 1/4″ on the top and bottom of the bias tape.
-
-
Top Pocket: Fold the bottom of the vinyl 1/2 inch toward the front of the pocket, place the fold in between the bias tape strip, center on top of the zipper . (Note: You will sew the finishing seam at the bottom of the pocket at the top of the zipper when you attach the pocket to the vinyl lining.)
Fold 1/2 inch of the top vinyl pocket , place the fold in between the bias tape strip, and center on the third zipper bottom. Sew two seams 1/4″ on the top and bottom of the bias tape. (Repeat with the upper top vinyl pocket.)
2. Attach the vinyl pockets to the vinyl lining by placing the finishing zipper seams at the bottom of the top pocket over the existing seam stitches and the bottom of the middle pocket.
3. Sew the four binding fabric strips together creating one continuous binding.
-
Place the front sides together on one end of the fabric strip creating a “L” shape and sew diagonally across the end of the strip from left to right of the strip.

-
Trim the fabric approximately 1/4″ away from the seam. And repeat to complete the binding.

4. Grab the remaining bias tape and stitch along the open edge or both sides if you like to finish the bag tie.
-
Fold the tie in half and double stitch 1/4″ seam on the fold on the top center of the front panel.

5. Sew the binding trim to the pre-quilted fabric 3/4″ seam allowance starting from the middle of the side front panel.
-
Start sewing the trim 1/2 inch from the beginning of the binding trim. Sew the trim to the first corner of panel and remove from the sewing machine.
-
Fold the binding trim flat across the next corner pin in place and sew to the second corner.
-
Repeat the process until you’re near your starting point.
-
Sew a straight stitch to close the binding trim loosely. (This will allow you to fold-over the seam to complete the binding trim.)
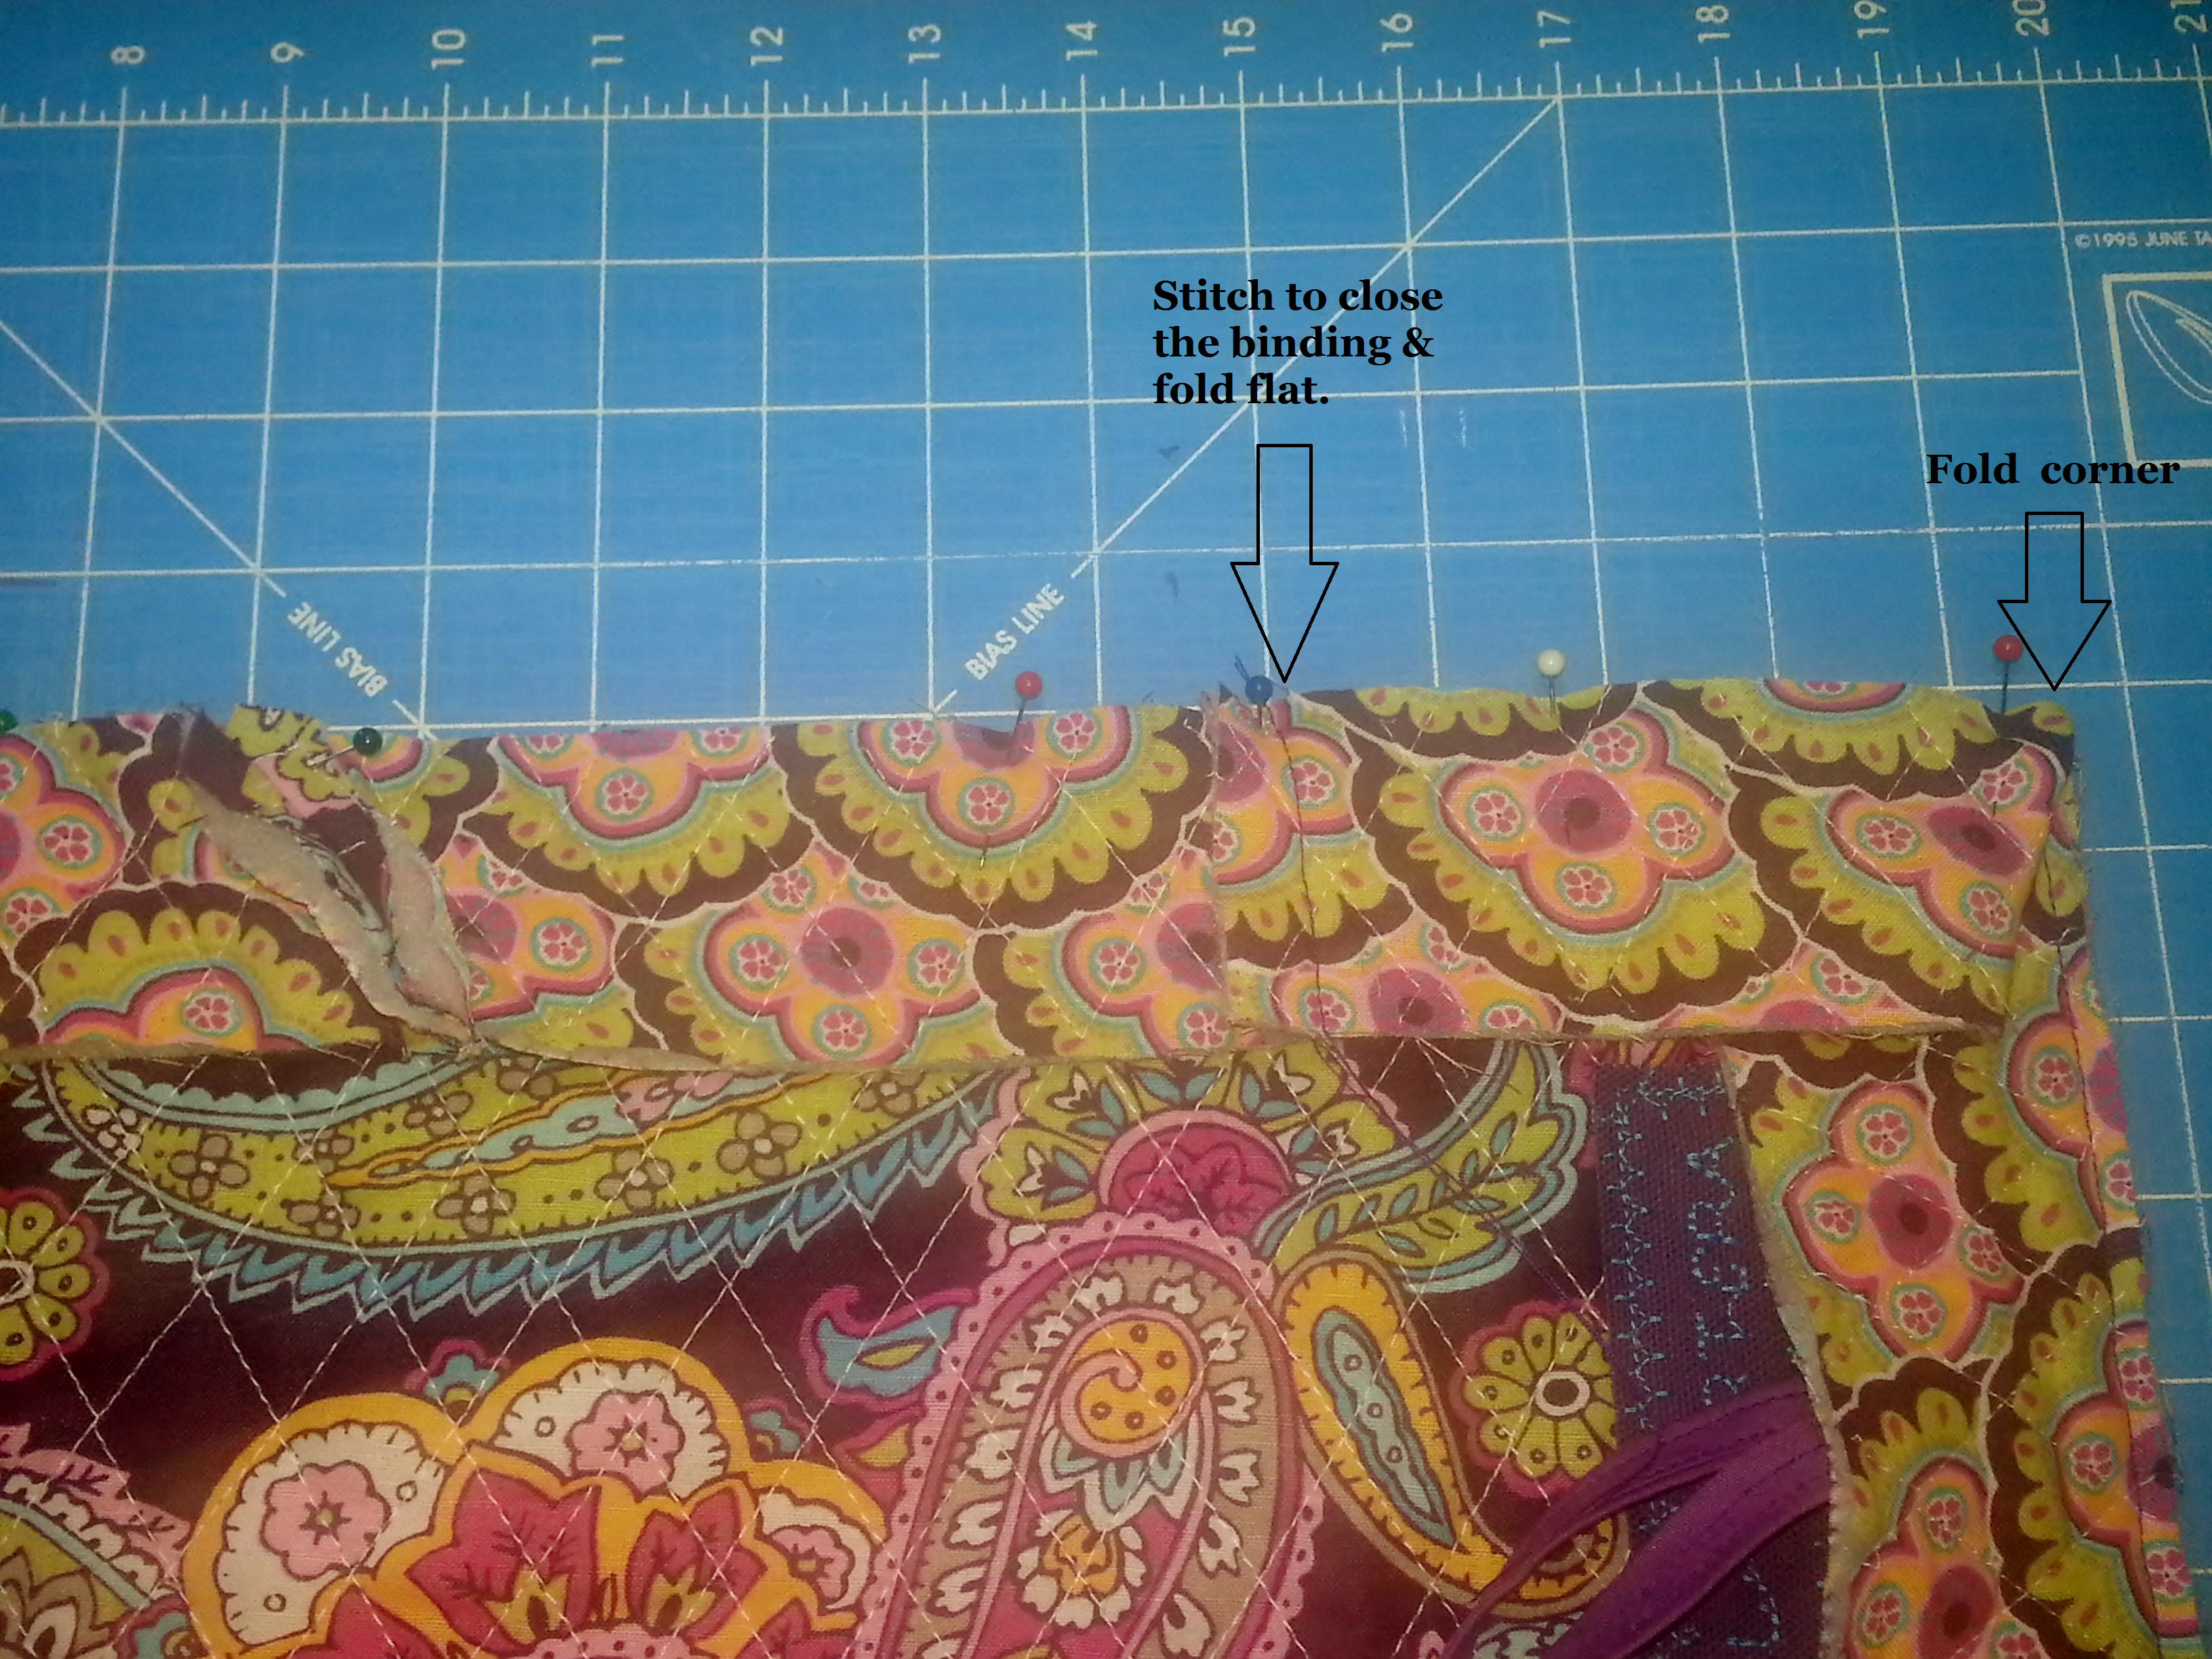
6. Press the seams toward the edges of the panel, fold the binding trim in half and press the fold to use as a guide for finishing seams. Make sure you sew the binding closing seams flat.

7. Place the vinyl lining against the backside of the panel and fold the binding trim on top of the pockets. Ensure the binding trim is folded to cover the original binding seam to create 1/5″ border. Tuck the corners and watch out for the metal zipper parts.

8. Test the pockets to ensure that the vinyl pockets are secured under the binding.

Please share a picture of your finished pouch with me. Post a blog link or contact me via email with your pictures.
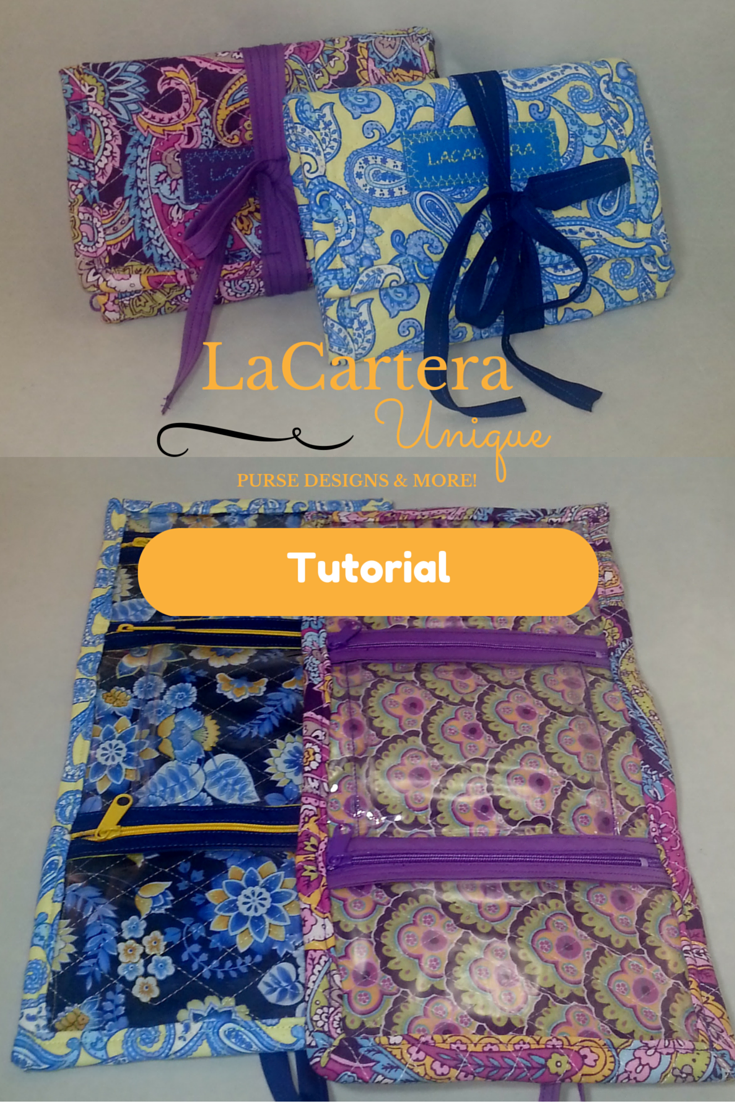
Pin this for later!
Stay tuned there’s more to come from LaCartera!


Cool! 🙂
LikeLiked by 1 person
This is a quick project for satisfying results. I just gave one as a gift to a friend. And she loved it! 🙂
LikeLiked by 1 person
I bet. It looks handy.
LikeLiked by 1 person
Fab tutorial! Thank you! 😀
LikeLiked by 1 person
You’re welcome!
LikeLiked by 1 person
Wonderful tutorial! Tutorials take so much time to put together, so thanks so much for sharing! This would make a wonderful gift for friends and family this Christmas. 🙂
LikeLike
Thank you, Gina! I thought it would make a perfect gift too.
LikeLike
Like the colors and patterns. Sooooooooo 1960s .
LikeLiked by 1 person
Thank you! The patterns do have a retro look. 😀
LikeLike
Great tutorial!!
LikeLike
Thank you! Sorry I’m a little late in my response… I had a lot of fun with this, and come to think of it, I never made one for myself. I guess that’s the way it goes sometimes. 🙂
LikeLiked by 1 person
Isn’t that the way!
LikeLike