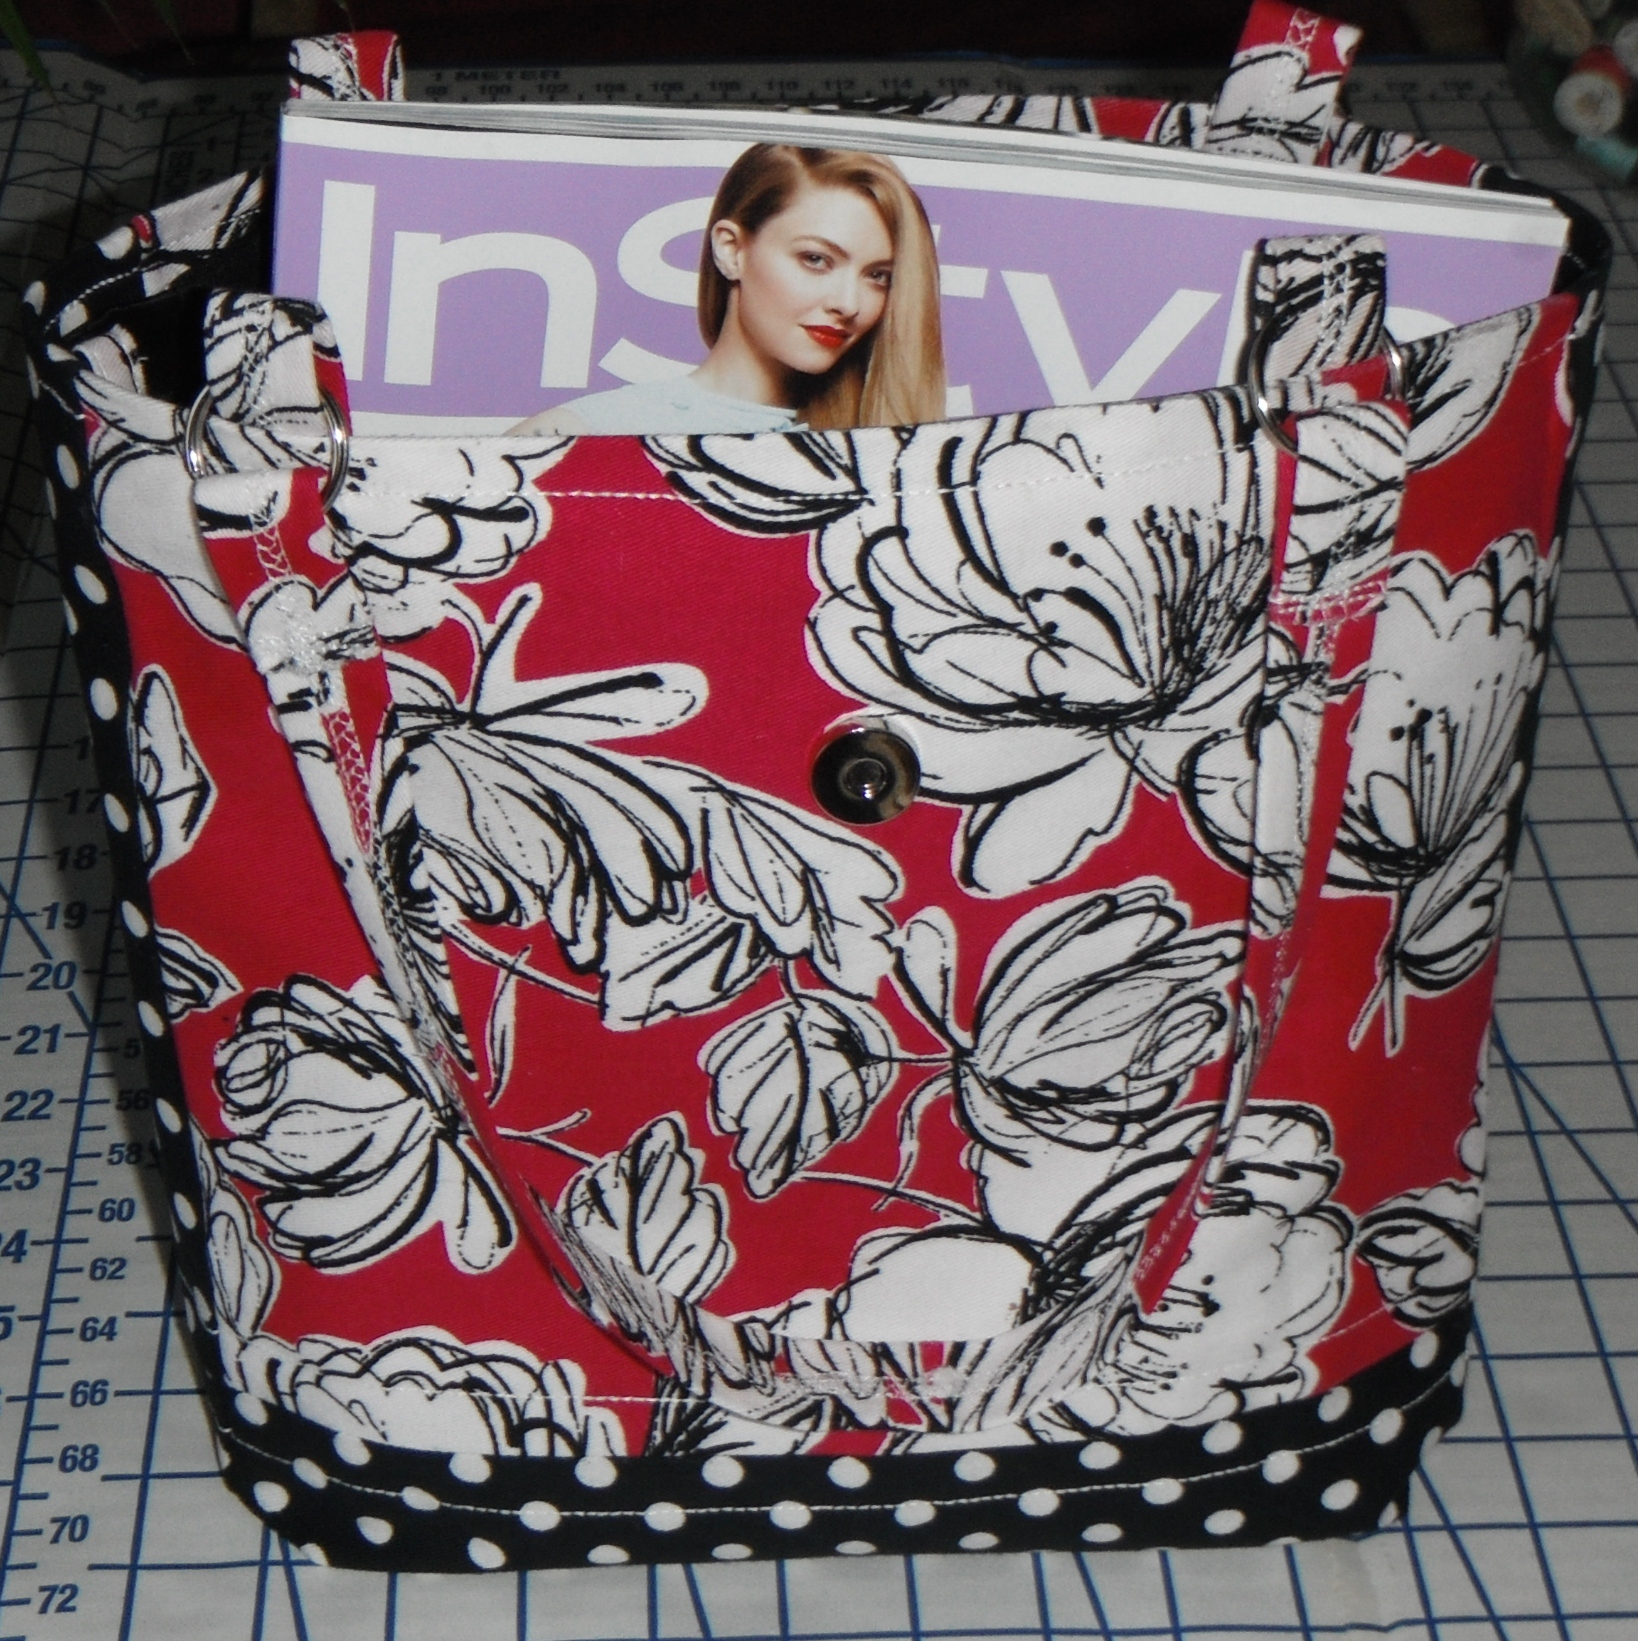
 This cute magazine size tote bag, is well worth the effort. The lesson I’ve learned is that arranging the proper color coordination with contrasting fabrics can make, or break your design. With only two placemats in this color palate, made me a little nervous. I knew that I couldn’t afford any mistakes while creating, cutting, or designing. Relying only on your imagination is not easy.
Upcycled, repurposed, reuse of, or just plain old recycled materials are the textiles of choice this month. I’m not saying that next month won’t include these textiles, but there will be some variety. I haven’t started to explore my fabric arsenal options yet.
I am, energized by the challenge and I hope if you’re following me, you are inspired too! The recipe is simple; create what you love, love what you create and the rest will follow.
Tote Bag Tutorial
(Intermediate level)
Materials Needed:
- 2 placemats (canvas 12×18)
- Magnetic snap
- Lining (tablecloth)
- Fusible interfacing
- 4 Key Rings (1 inch)
Step 1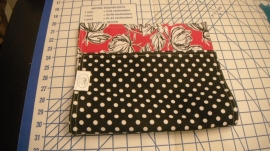

 Step 2

Cut front and back panels (two) from primary fabric 11 inches width x 12 inches length. Cut (two) coordinating fabric panels front and back 5 inches width x 11 inches length. Cut top side panels (two) coordinating fabric 6 inches width x 11 inches length. Cut bottom side panels (two) coordinating fabric 5 inches width x 6 inches length. Cut flap (one) coordinating fabric 2 1/2 inches width x 13 1/2 inches length. Cut straps (four) primary fabric 3 inches width x 11 1/2 inches length. Cut key ring tabs (four) primary fabric 3 inches width x 4 inches length.
Step 3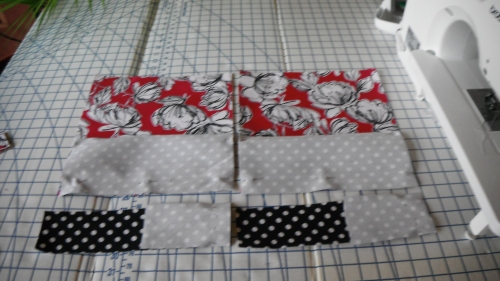

Take the front and back panel and pin the bottom panel to each. Sew 1 inch seam. Press the seam open on the right side of the fabric and sew a finishing stitch 1/2 inch above and below the 1 inch seam. Repeat the process on the side panels insuring that the finishing stitches and seams are aligned when the side panels are attached. {This technique will help create a skeleton frame for the tote bag}.
Step 4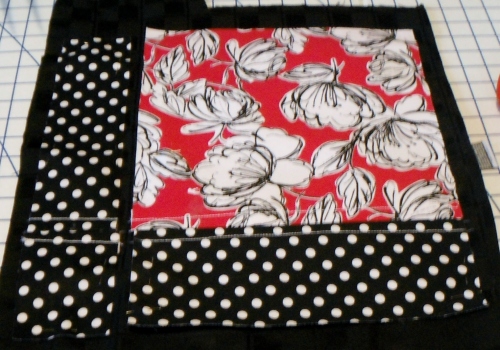

Use the completed front panel and one side panel as a guide for cutting the lining and the fusible interfacing (fold material) to create two panels each.
Step 5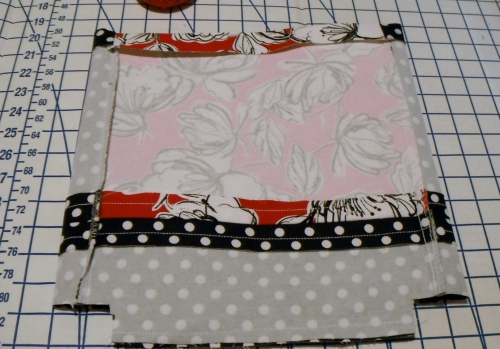

Attach the side panels to the front and back panels using a double stitch or serger machine. Ensure that the outer stitches are aligned along with the connecting seams. Cut a 1 inch width x 2 inch length square on each corner end. Sew the bottom seam. Also fold the top of the bag 1 inch and iron.
Step 6
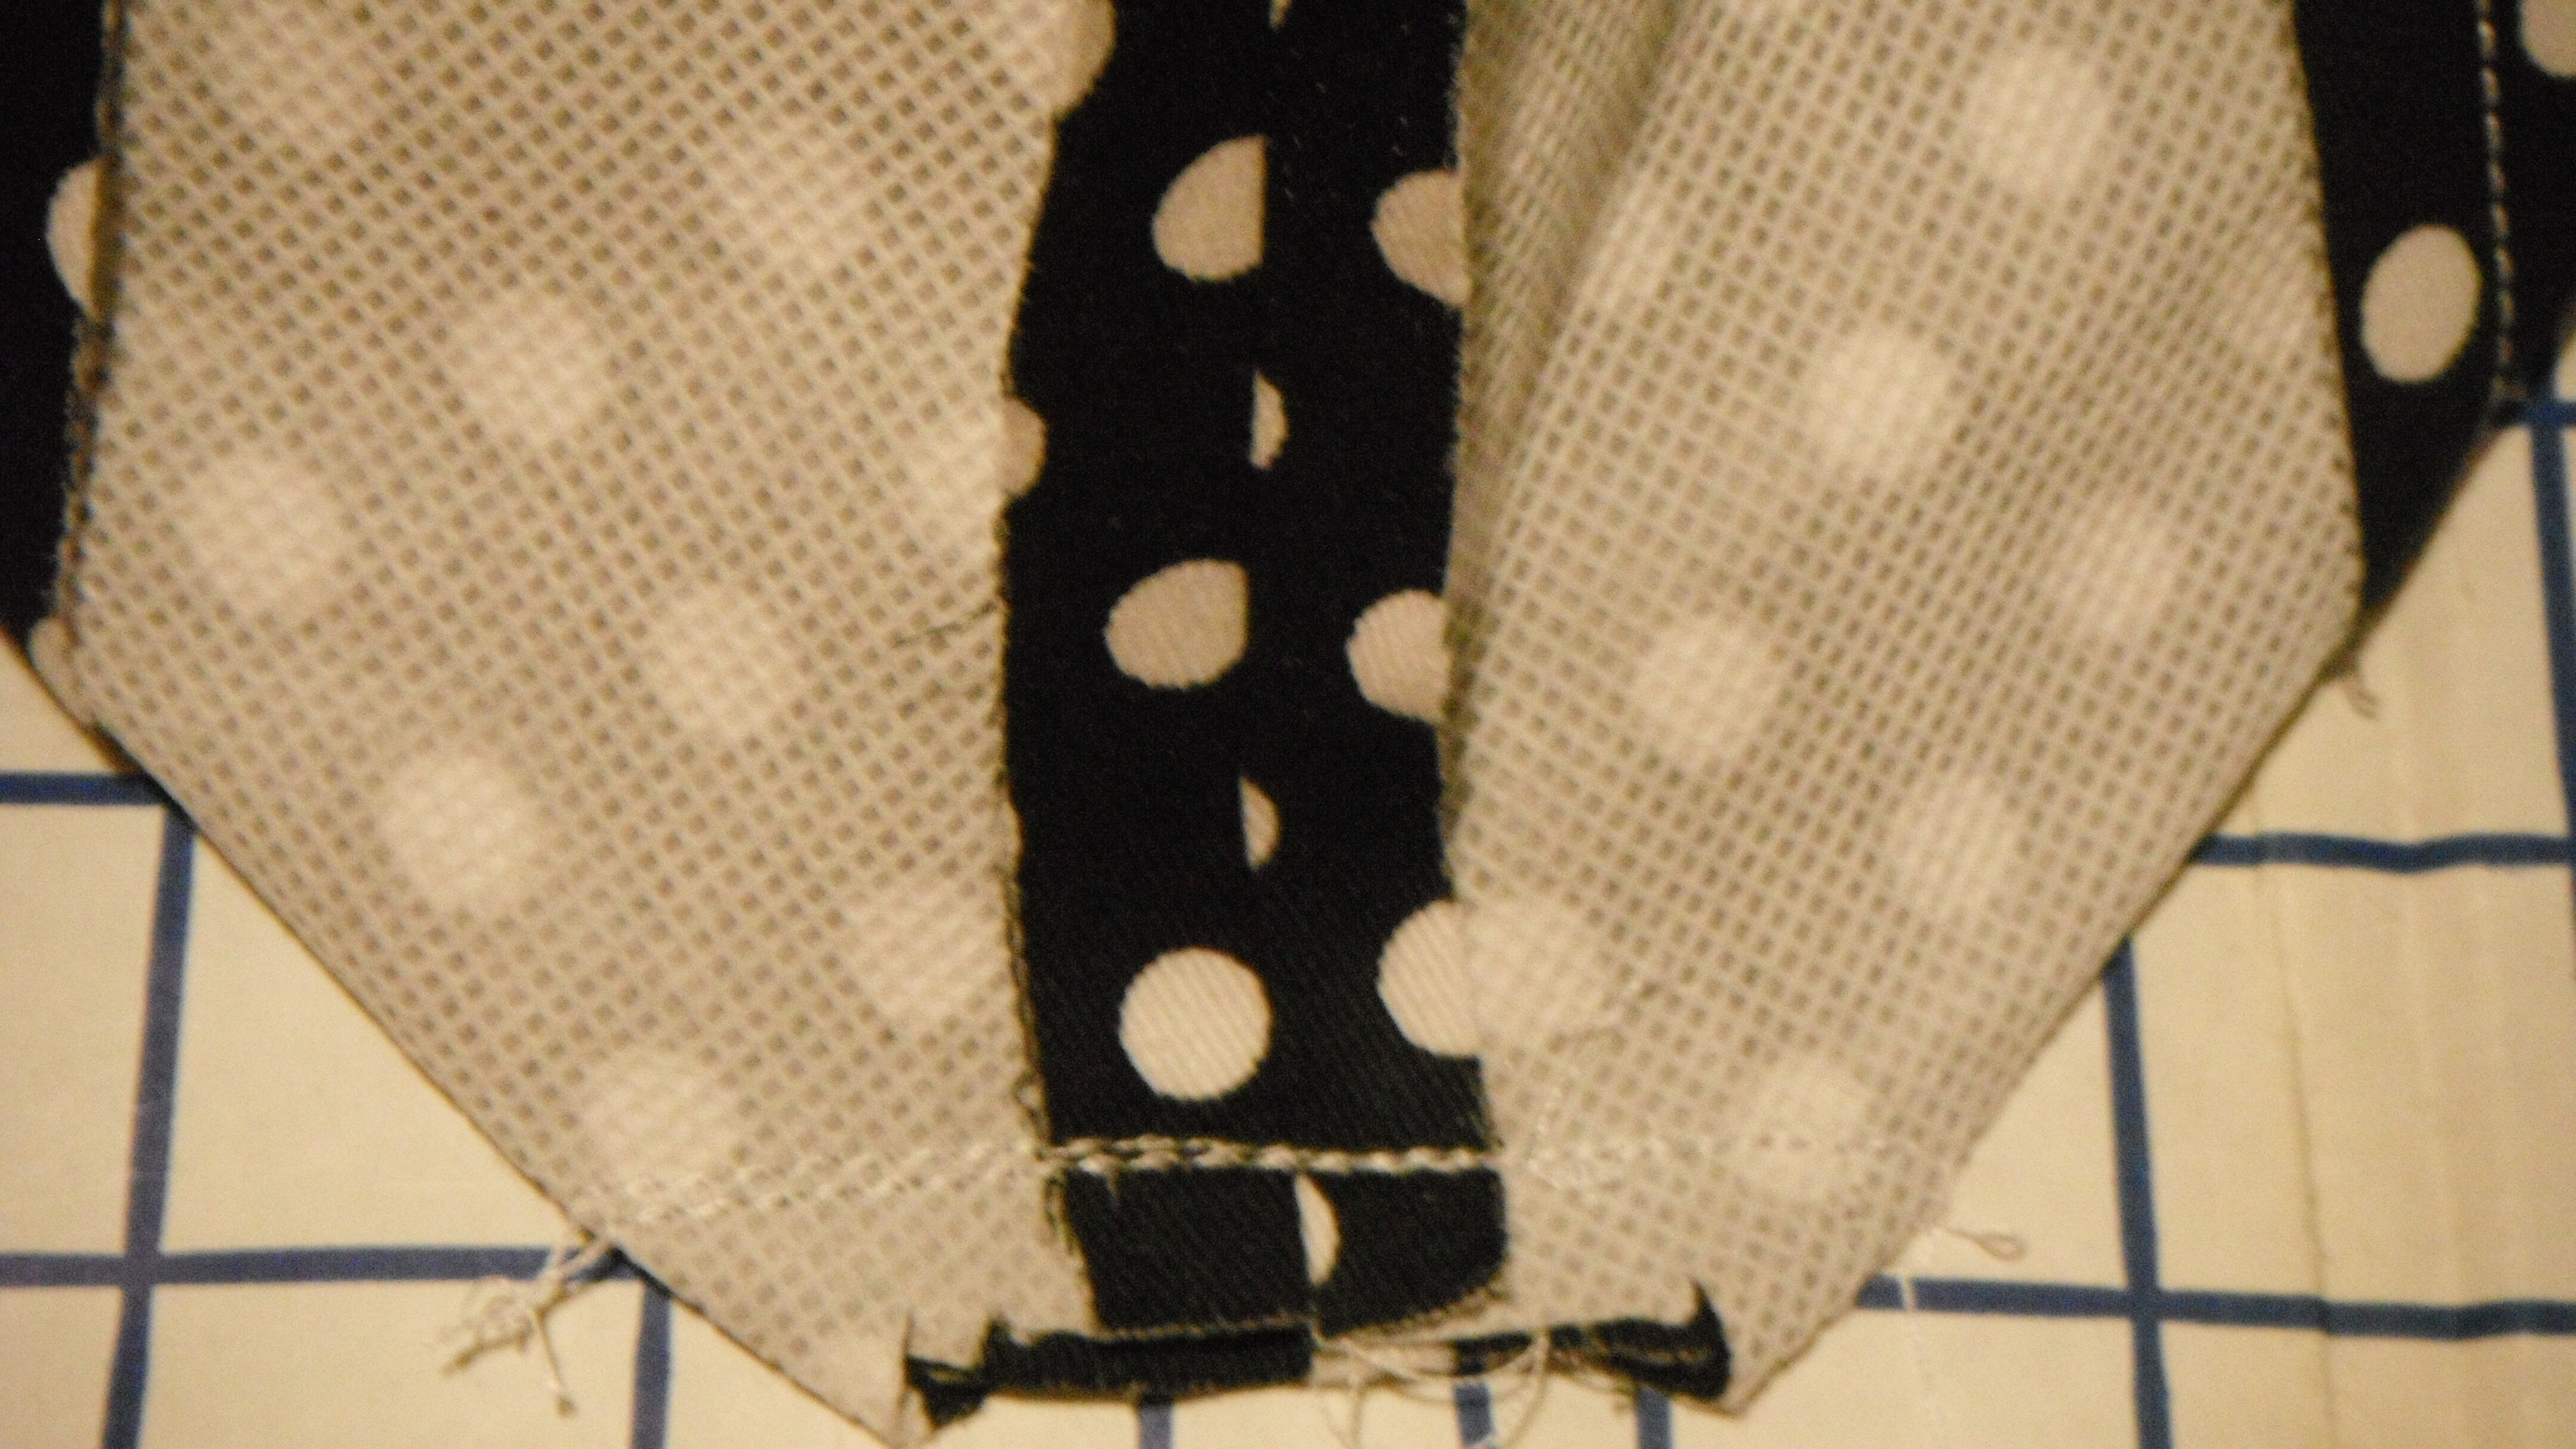
Match the cut corner and sew straight across to close the opening. Repeat on the other side. This will complete the bottom of the tote bag.
Step 7
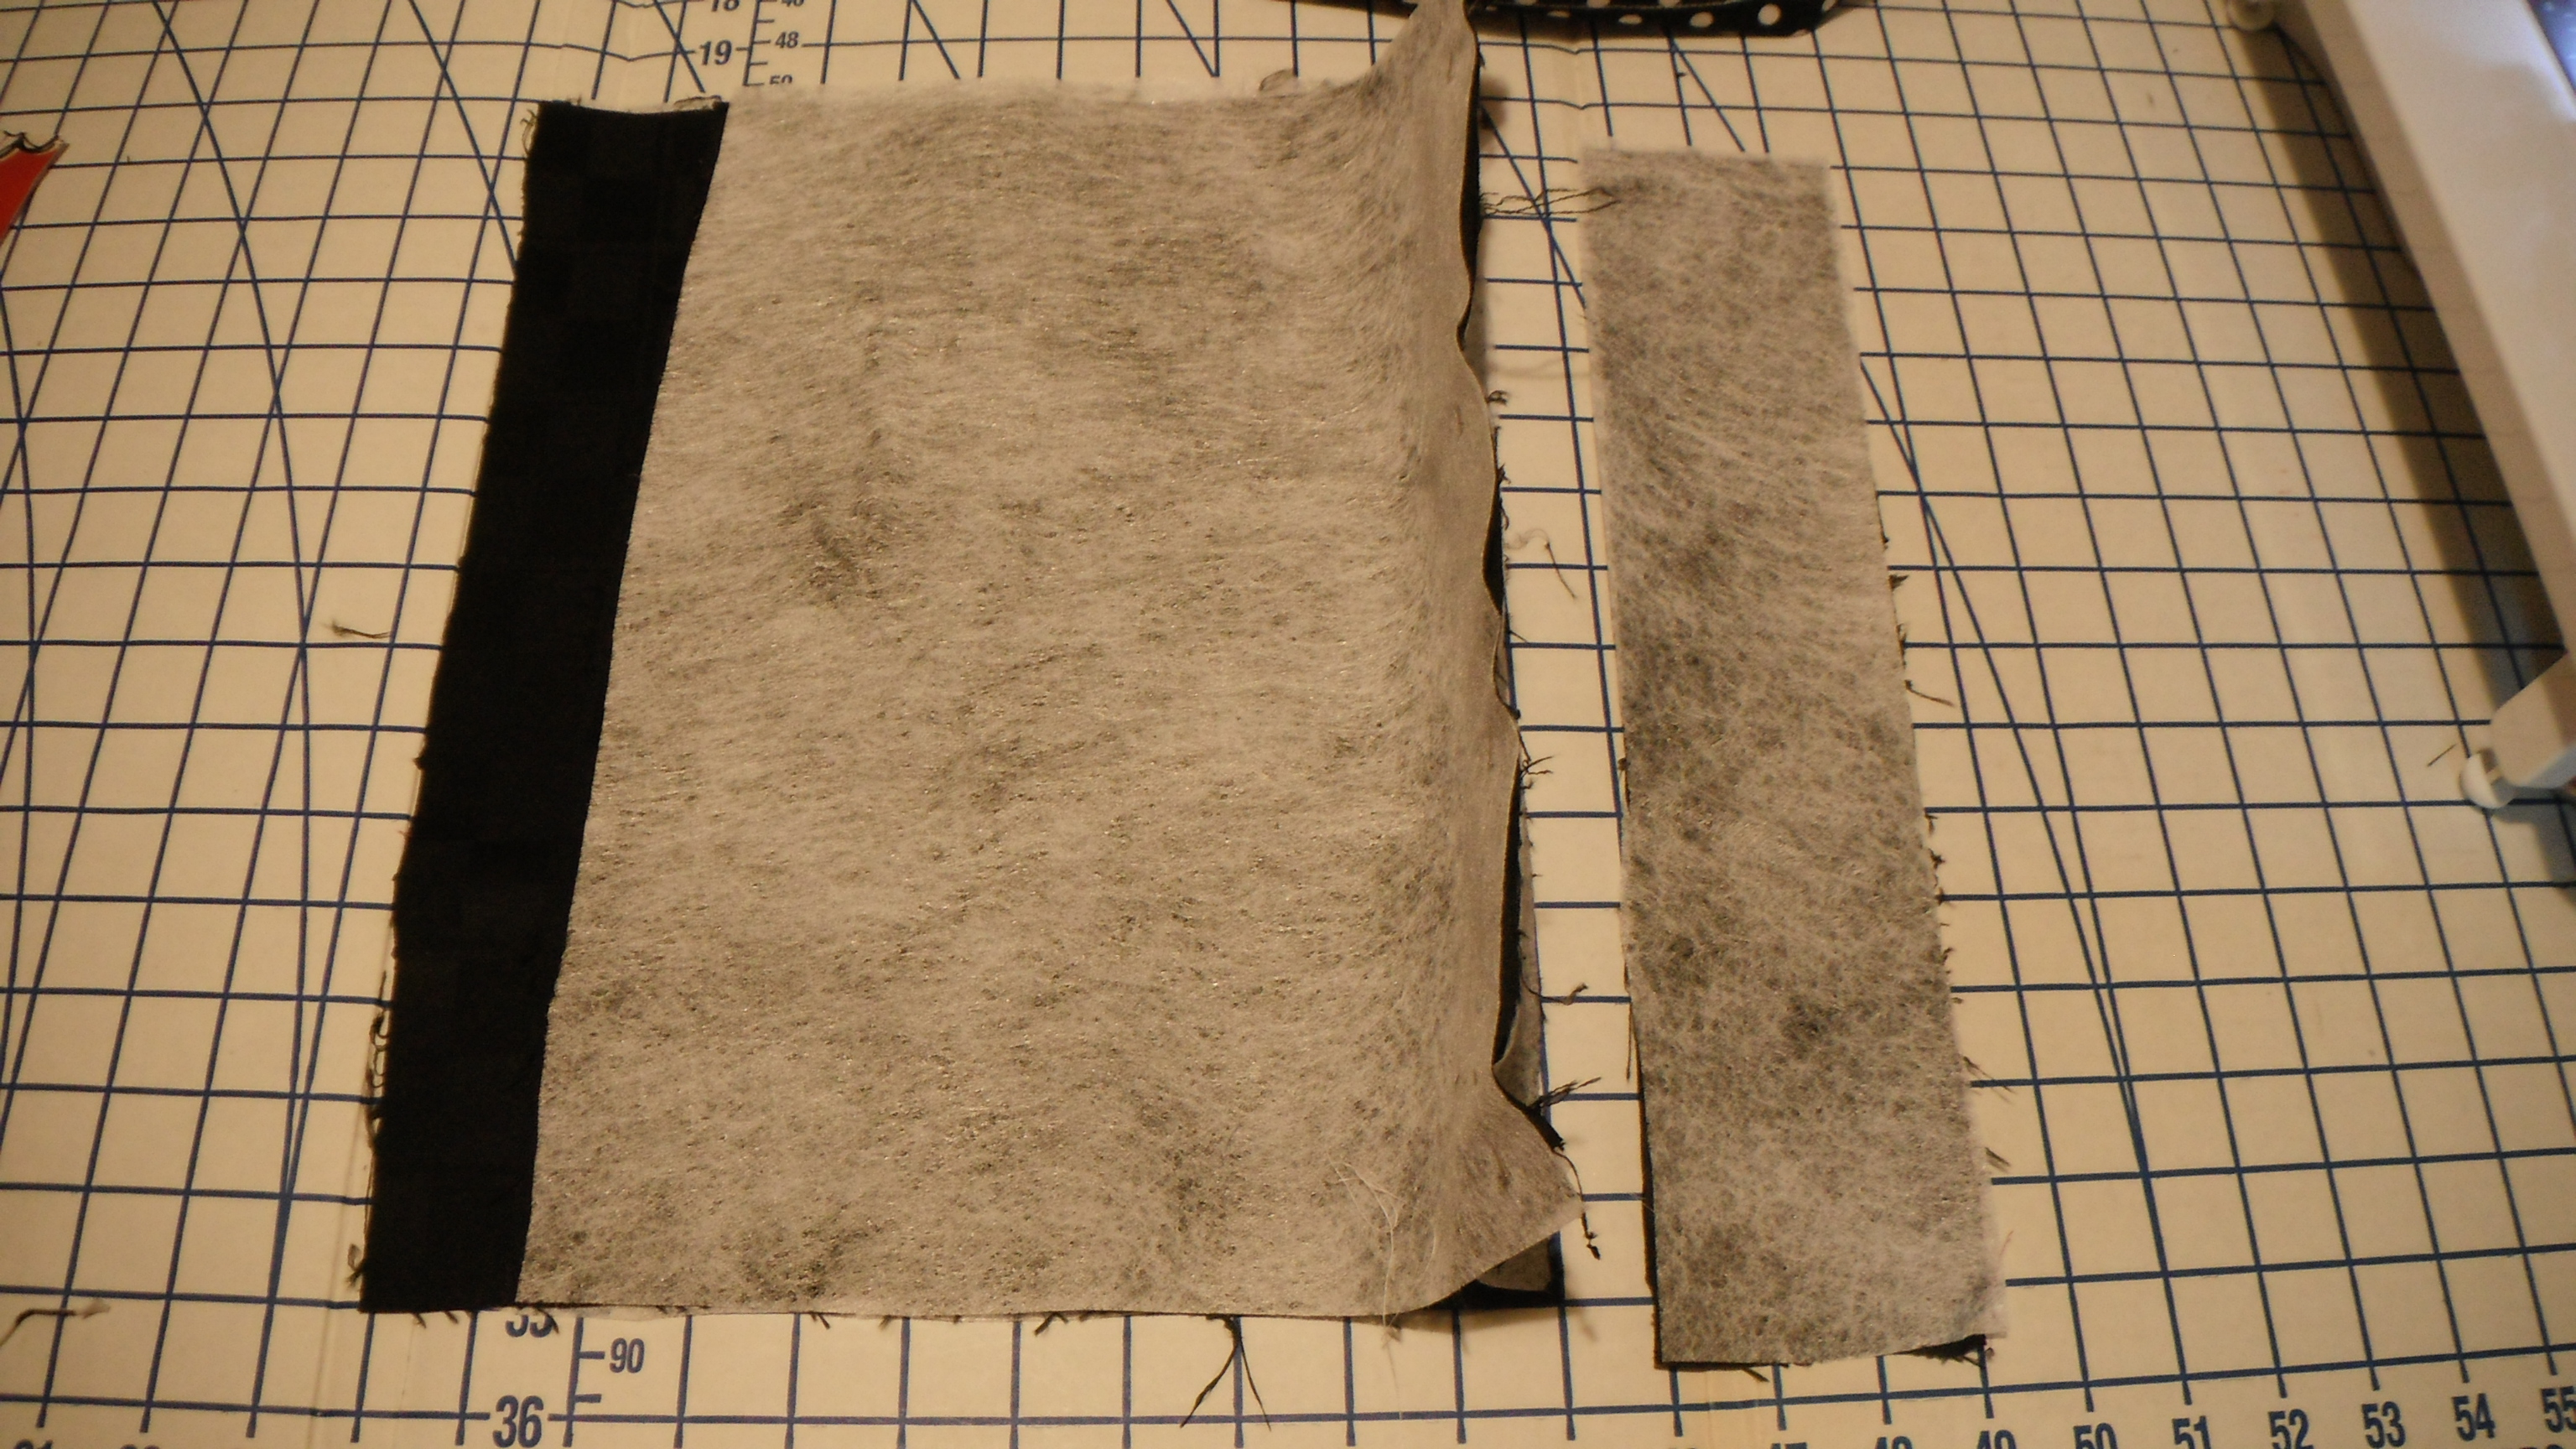
Before sewing the lining panels together. Iron the fusible interfacing to the lining. This will create additional structure and firmness to the bag.
Step 8 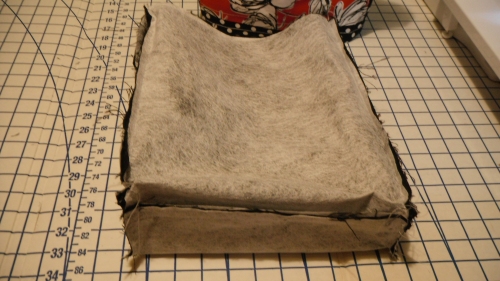

Repeat steps 5 &6 – Sew front and back panels to the side panels and finish the bottom of the tote. Trim 1/2 inch around the top of the lining.
Step 9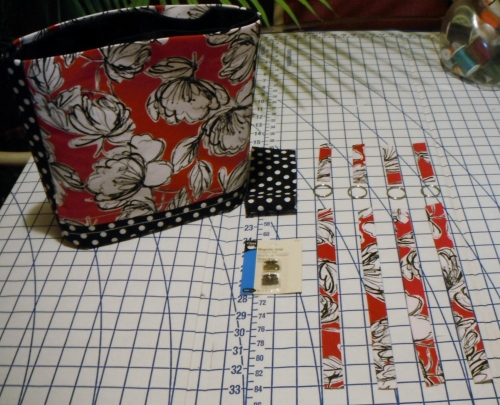

Insert the lining into the purse and make any adjustments for the proper fit folding the outer edges under 1 inch to create a seamless edge. Now concentrate on making the straps and flap.
Fold the flap in half folding the unfinished edges 1/2 inside to create a finished edge. Iron the flap to mark your fold and pin to the purse to mark the placement of your magnetic snap on the purse and flap. Insert the magnetic snaps on the purse and near the fold of the flap. Remove the flap and sew a decorative stitch on each side. Attach the flap to the purse using a matching decorative stitch to create a finished edge .
Take the four strap pieces and fold/iron them lengthwise to ( 1 inch width) creating a center seam. After creating the folds open and attach two straps ends right sides together. Sew a straight seam across, trim the excess fabric, re-fold and iron. Use the same decorative stitches directly on the center raw edge to create a finished look. Repeat to create two sturdy straps.
Use the same fold/iron technique to create the four (1 inch) tabs . Sew the same decorative stitch down the center. Fold in half and Iron.
Step 10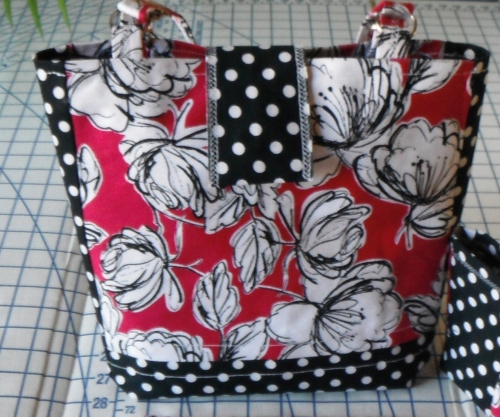

Turn the tote inside out. Place the lining inside with the two right sides together inside the tote. Take the folded tabs raw edges and pin them to the front and back panels 1 1/2 inch from each of the side panel seams. Ensure the tabs are in between the lining and the outer panels, and that 1 inch of the tab will be exposed when the bag is turned to its right side.
Sew the raw edges together connecting the tabs, leaving an opening on one side panel to turn the tote to its outer side. Iron the outer edges to help lay the seams flat, and ensure that 1 inch of the outer fabric is turned into the tote bag . Attach the four key rings to the tabs.
Fold each raw end of the straps (1 1/2 inch), iron, and double stitch across the raw end to the strap creating a loop to attach the strap to the key rings. Make sure that the raw edges are facing inwards when the straps are attached.
Step 11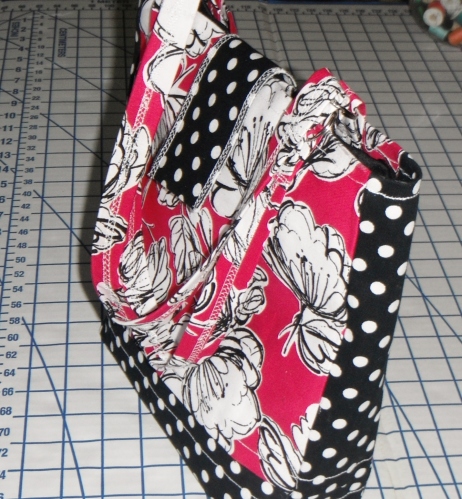

Sew the finishing straight stitch 1/2 inch from the tote’s top over the tabs to reinforce them. Hand stitch the lining opening to the bag .
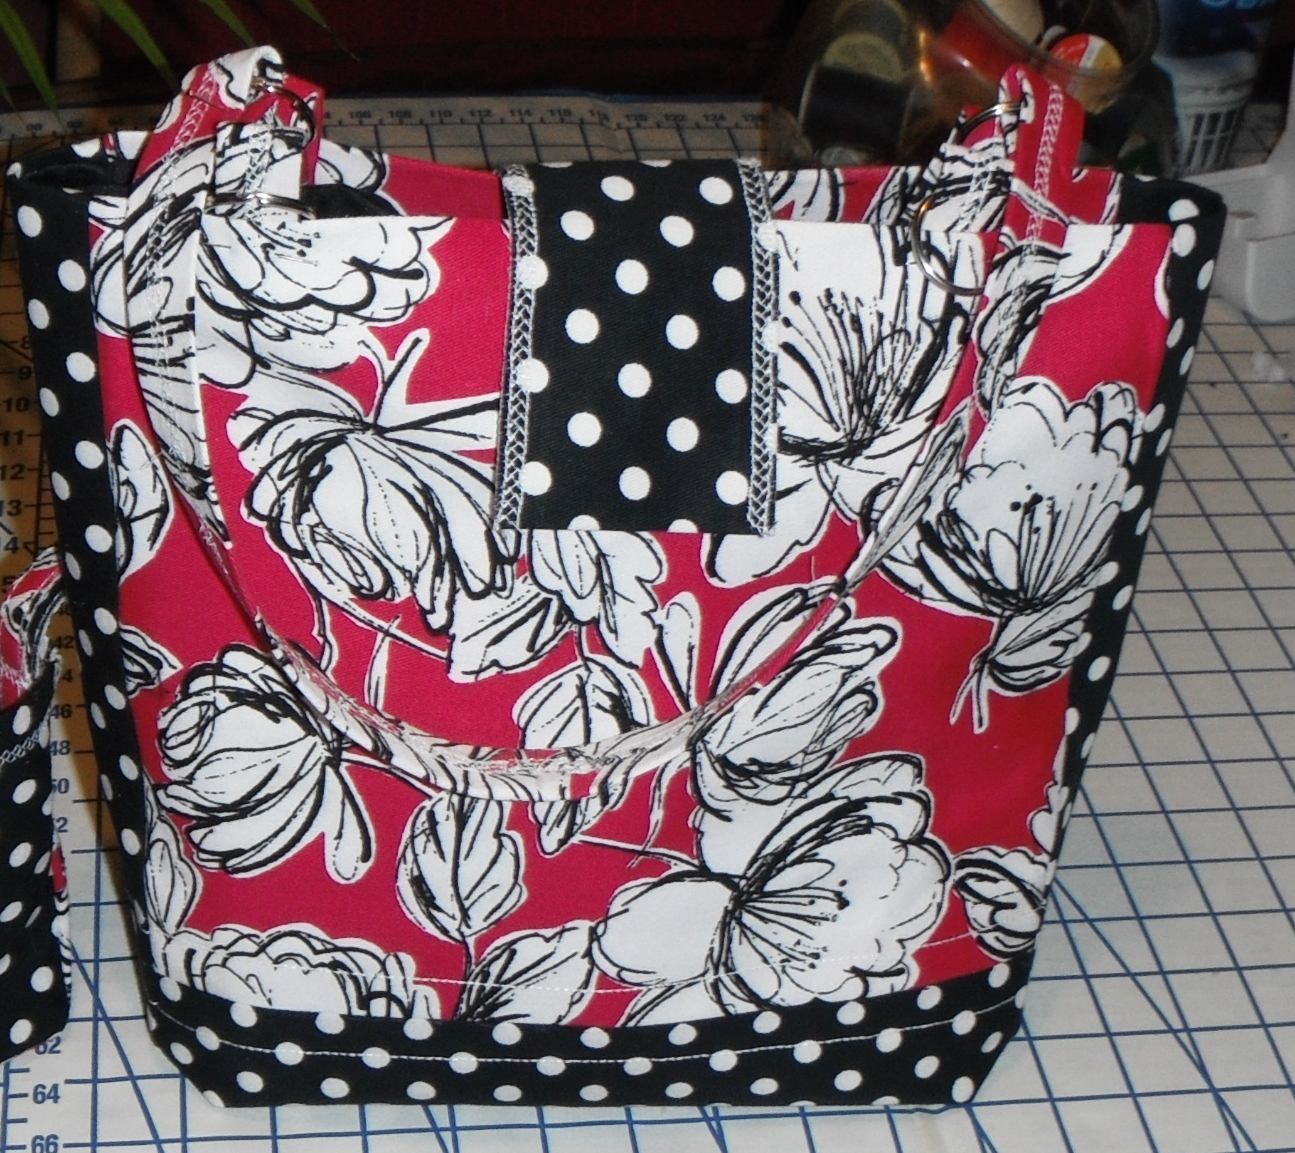
You have completed the Tote! Happy toting….Here’s the back view of the tote. Feel free to like this page and make comments. I want to know what you think.

Related articles
- The Hippie Conversion Tote (lcartera.wordpress.com)
- Urban Summer Purse Tutorial Part #1 (lcartera.wordpress.com)
- Creme de Menthe Pruse Tutorial (lcartera.wordpress.com)
- Spring Tote Bag (lcartera.wordpress.com)
- Tangerine Foldover Clutch Tutorial (lcartera.wordpress.com)
- Urban Summer Purse Tutorial~ Part #2 (lcartera.wordpress.com)


Hello there, I just wanted to let you know that I love your blog… & I am giving you an award. Please check it out here:
http://everythingunderthesunandmore.wordpress.com/2013/01/12/another-award-for-me-the-versatile-blogger-award/
LikeLike
Congratz on your second award – you’re on a roll, and Thank You for nominating me as one of your favorite blogs! You’re the best!
LikeLike
Thank you! I know! I am working so very hard on this blog. It isn’t even funny! LOL! And your’e welcome:)
LikeLike
I think we started blogging around the same time. I can agree that it’s hard work and I’m only a part-time blogger. So this has become my second job! (LOL) Keep being a phenomenal woman!
LikeLike
Thank you ! And I will def try! I am a full time blogger 🙂 Addicted !
LikeLike
What a cool idea to reuse the tableclothes sort of like plain old fabric- that has already been hemmed for you in some sections! Very original, I love it.
LikeLike
Thank You! I appreciate your feedback, and your site is pretty cool too. 🙂
LikeLike
Aaw, thanks for looking me up!
LikeLike
Welcome! Thank you for subscribing to follow my blog. I hope you are encouraged, inspired and enjoy the photos I take of life’s events as seen through the lens of my camera.
BE ENCOURAGED! BE BLESSED!
LikeLike
This is so cute – what a great tutorial! Thanks so much for following my blog.
LikeLike
Thank you! I can’t wait to see more of your beautiful stitches.
LikeLike
Reblogged this on Make Something Mondays! and commented:
Check out this upcycled tote back tutorual from La Cartera! I’m going to try this!
LikeLike
Excellent tutorial and the bag is looking to be so very useful!
LikeLike
Thank you Susan! It is such a fun project. ..👜
LikeLike